How to Screen Record
Screen recording is one feature which is enable in almost all the computer and mobile devices. You can also download various screen recording apps from your Google Play store in case the screen recording option is not available in your device.
In this article we will see how to screen record in various devices like iOS , android , mac and windows PC.
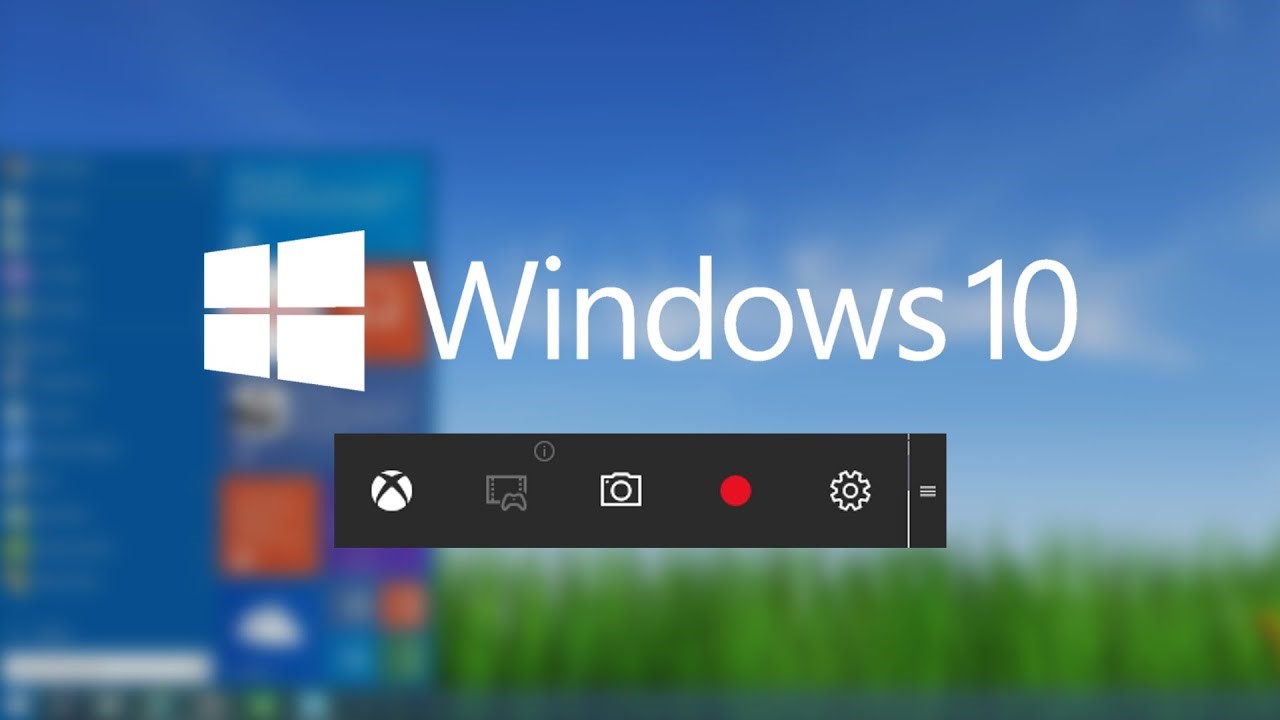
How to Screen Record in Windows 10
- You'll notice a "record" button.
- Or you can press the Windows key + Alt + R at the same time to start recording.
- You can just use the keyboard shortcut to start recording screen activity.
- Recordings are automatically saved in MP4 format in the Videos > Captures subfolder of your user folder.
- You can also access the recordings via the Game bar.
How to Screen Record in iOS
There are two ways to screen record In iOS:
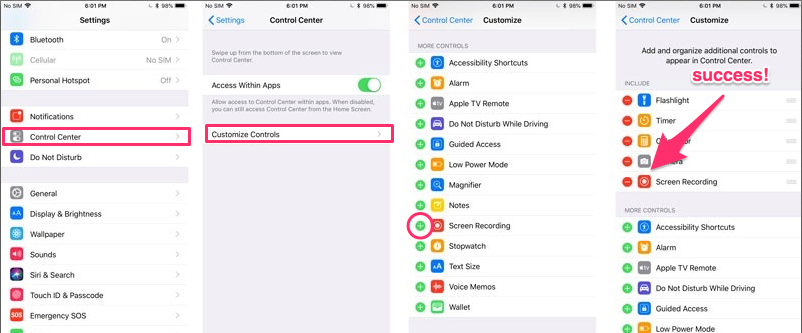
In Settings Option
- Go to Settings > Control Center > Customize Controls.
- Then tap
 next to Screen Recording.
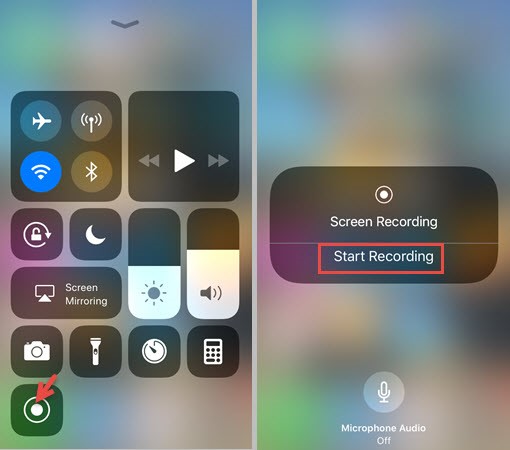
From Control Panel
- Swipe up from the bottom edge of any screen. On iPhone X or later or iPad with iOS 12 or later, or iPadOS, swipe down from the upper-right corner of the screen.
- Press deeply on
 and tap Microphone.
 - Tap Start Recording, then wait for the three-second countdown.
- Open Control Centre and tap
 . Or tap the red status bar at the top of your screen and tap Stop.
Go to the Photos app and select your screen recording
How to Screen Record on Mac
There are two ways in which you can screen record on you mac:
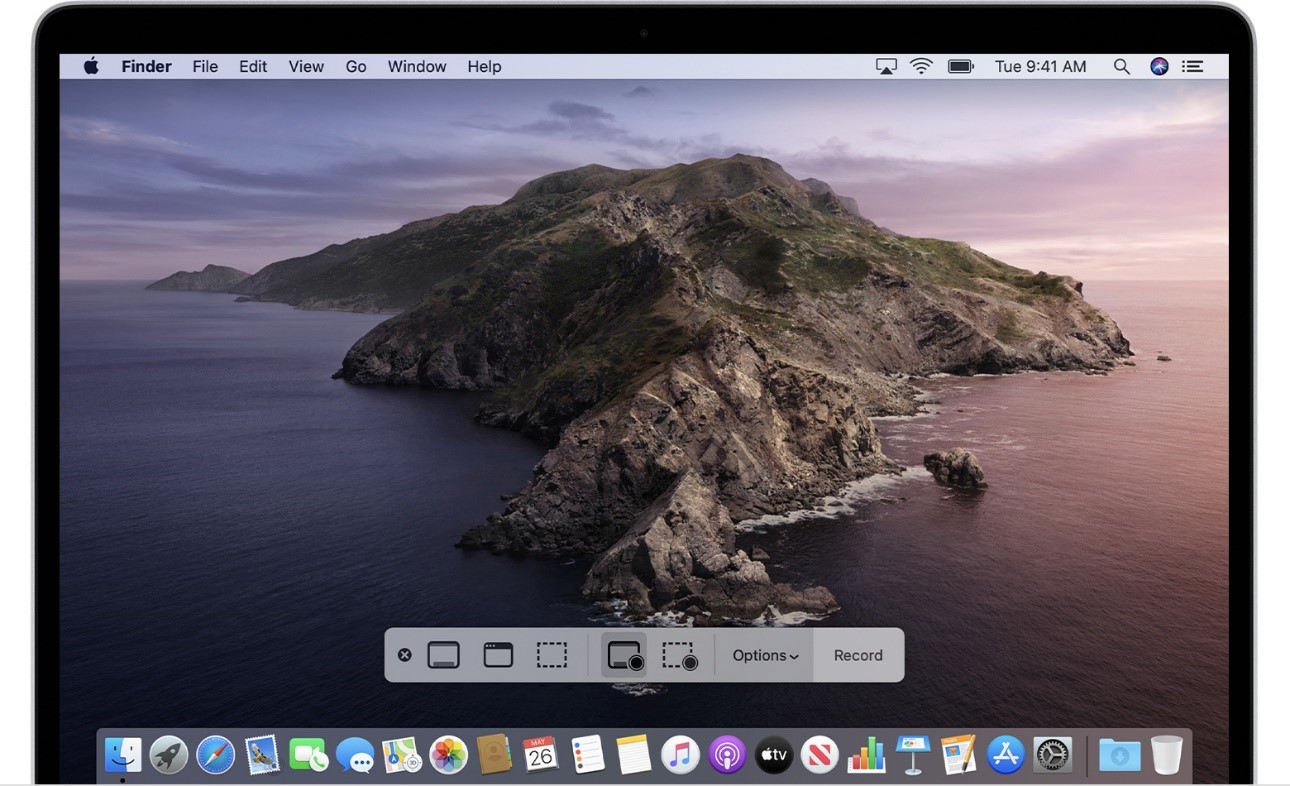
Press Shift-Command (⌘)-5 on your keyboard to see onscreen controls for recording the entire screen, recording a selected portion or capturing still image. You can also record the screen with Quick Time Player instead.
Record the entire screen
- Click
 in the onscreen controls. Your pointer changes to a camera
 .
. - Click any screen to start recording that screen, or click Record in the onscreen controls.
- To stop recording, click
 in the menu bar. Or press Command-Control-Esc (Escape).
 - Use the thumbnail to trim, share, save or take other actions.
Record a selected portion of the screen
- Click
 in the onscreen controls.
 - Drag to select an area of the screen to record. To move the entire selection, drag from within the selection.
- To start recording, click Record in the onscreen controls.
- To stop recording, click
 in the menu bar. Or press Command-Control-Esc (Escape).
 - Use the thumbnail to trim, share, save or take other actions.

Trim, share, and save
After you stop recording, a thumbnail of the video appears briefly in the lower-right corner of your screen.
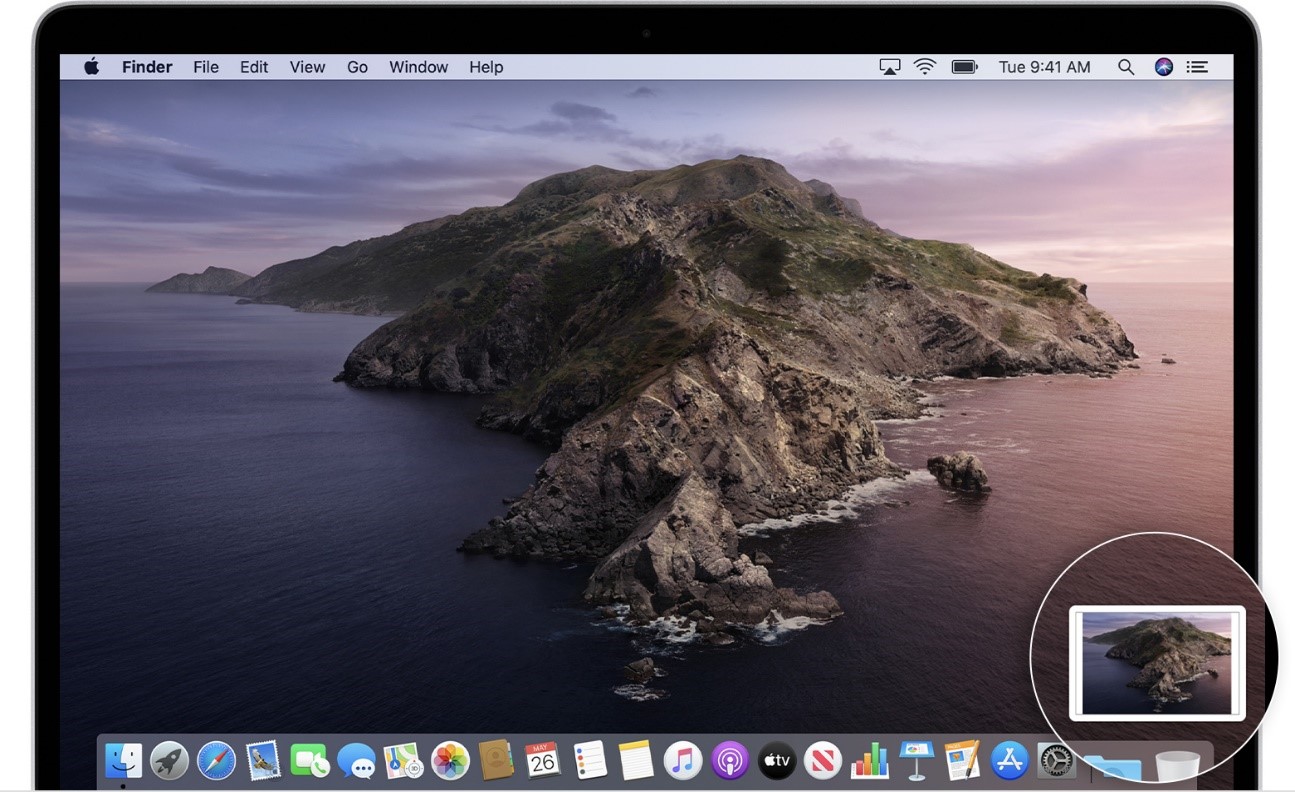
- Take no action or swipe the thumbnail to the right and the recording is automatically saved.
- Click the thumbnail to open the recording. You can then click
 to trim the recording, or click
 to share it.
 - Drag the thumbnail to move the recording to another location, such as to a document, an email, a Finder window, or the Trash.
- Control-click the thumbnail for more options. For example, you can change the save location, open the recording in an app, or delete the recording without saving it.
Change the settings
Click Options in the onscreen controls to change these settings:
- Save to: Choose where your recordings are automatically saved, such as Desktop, Documents, or Clipboard.
- Timer: Choose when to begin recording: immediately, 5 seconds, or 10 seconds after you click to record.
- Microphone: To record your voice or other audio along with your recording, choose a microphone.
- Show Floating Thumbnail: Choose whether to show the thumbnail.
- Remember Last Selection: Choose whether to default to the selections you made the last time you used this tool.
- Show Mouse Clicks: Choose whether to show a black circle around your pointer when you click in the recording.
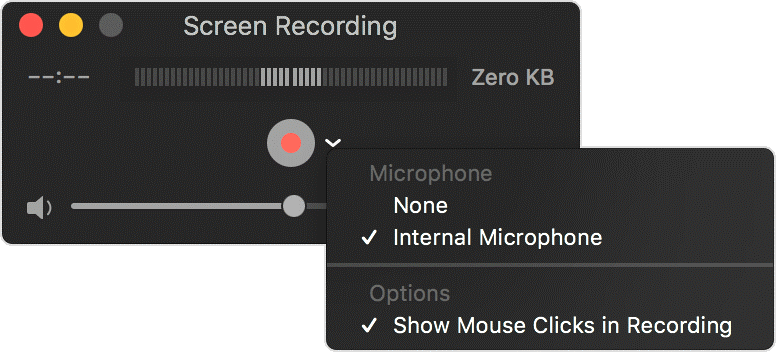
Use QuickTime Player
- Open QuickTime Player from your Applications folder.
- Choose File > New Screen Recording from the menu bar.
- You will the Screen Recording window described in the following steps.
- Before starting your recording, you can click the arrow next to
 to change the recording settings:
 - To record your voice or other audio with the screen recording, choose a microphone. To monitor that audio during recording, adjust the volume slider (if you get audio feedback, lower the volume or use headphones with a microphone).
- To show a black circle around your pointer when you click, choose Show Mouse Clicks in Recording.
- To start recording, click
 and then take one of these actions:
 - Click anywhere on the screen to begin recording the entire screen.
- Or drag to select an area to record, then click Start Recording within that area.
- To stop recording, click
 in the menu bar, or press Command-Control-Esc (Escape).
 - After you stop recording, QuickTime Player automatically opens the recording. You can now play, edit or share the recording.
How to Screen Record in Android
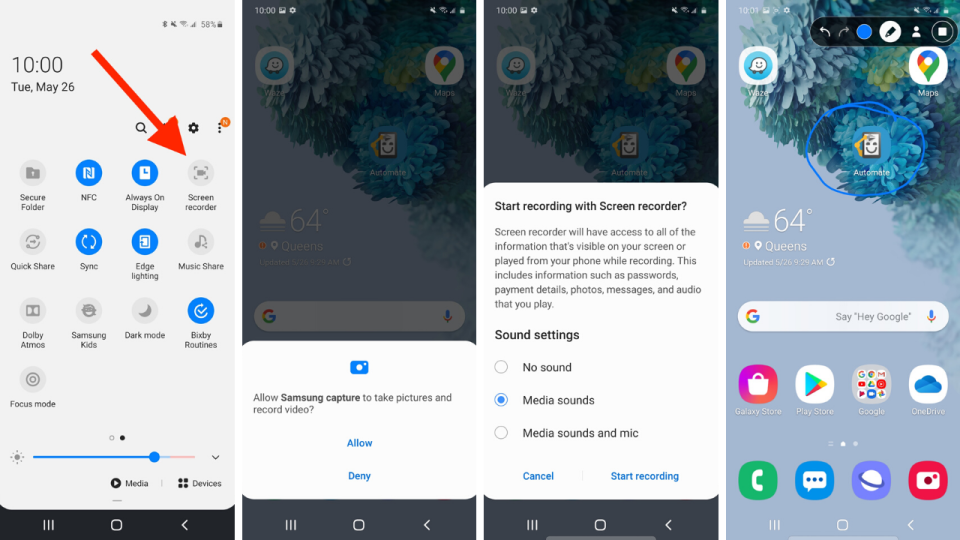
- Pull down the notification shade from the top of the screen to view your quick settings options.
- Tap the screen recorder icon and give permission to the device to record the screen.
- You can then start recording; tap stop when finished, then save the video to your phone gallery.
Keep your data at the tip of your finger.
We offer services that is user-friendly, access to quick backing up & the simplest for our clients.